Site KMZ

Site documentation · GPS · KMZ

Every site photo, stamped with where it was taken, and which way you were facing.

Site KMZ captures GPS position, elevation, compass bearing and time for each photo, then packages the whole walk into a single KMZ file you can open in Google Earth.

Join the test (we'll email you the link)

Store links go live at launch · GPS must be on for photos to appear in Google Earth
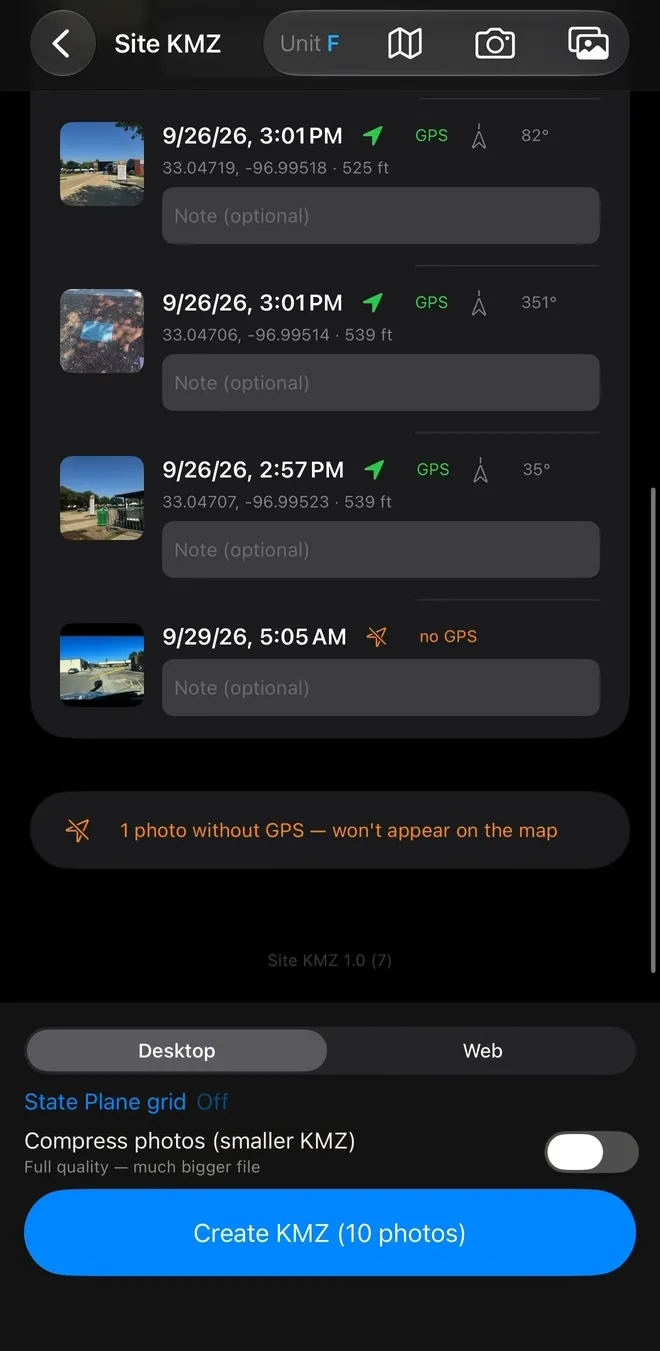
Site KMZ report with photo rows: each row carries a thumbnail, a timestamp, a green GPS tag, a compass bearing, coordinates and elevation, and a note field, with the last row flagged no GPS in orange, above a warning that it won't appear on the map and a blue Create KMZ (10 photos) button.
Photos (10) GPS · bearing · elevation
Coordinates33.04719, -96.99518
Elevation525 ft
Bearing082°
FixGPS locked
Output.KMZ

What it does

A photo walk that documents itself.

Four things happen between taking a picture and handing over a file. Nothing else is in the way.

  1. 01

    Every photo carries a full geometric record

    Position, elevation and compass bearing are stamped at capture, alongside the date and time. A green GPS tag marks the rows that locked a fix, and a row that missed is flagged no GPS in orange, so you know which photos will appear on the map.

    CoordinatesElevationBearingTimestampNo-GPS flag
  2. 02

    Mark the exact issue, on the image

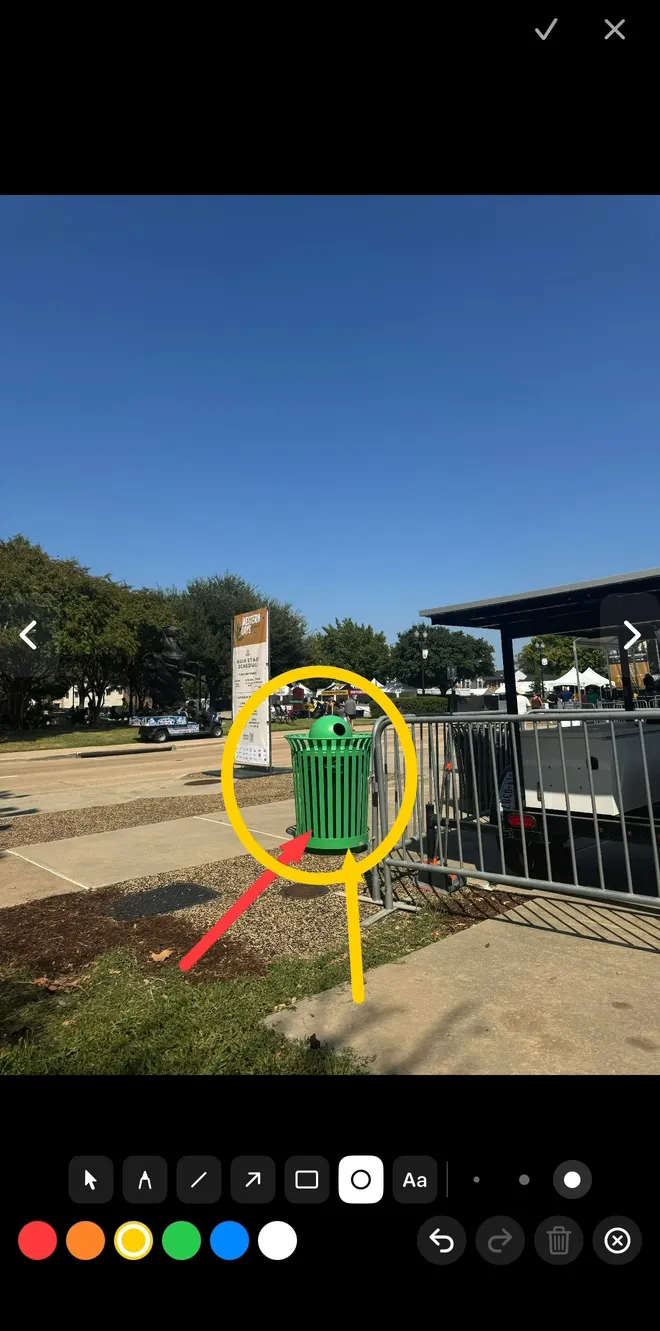
    A built-in annotation editor opens over any photo: pen, line, arrow, rectangle, ellipse and text tools in six colors, with undo, redo, delete and clear. Circle the crack, arrow the damaged corner, caption the frame.

    ArrowEllipseText6 colorsUndo / redo
  3. 03

    Two export modes, one honest trade-off

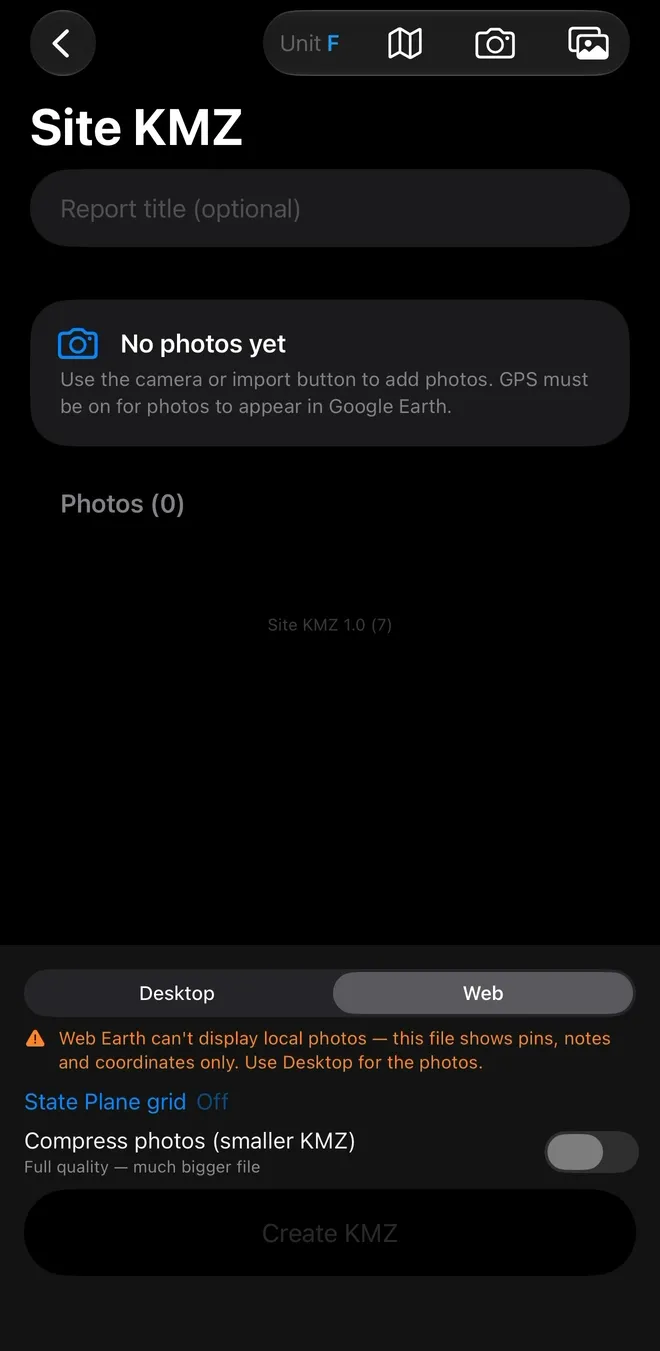
    Desktop embeds the actual imagery so it renders in Google Earth Pro. Web trades the photos away for a light file of pins, notes and coordinates - because Google Earth Web cannot display local image files. The app tells you this before you export, not after.

    DesktopWebState Plane gridCompression
  4. 04

    One tap to a shareable KMZ

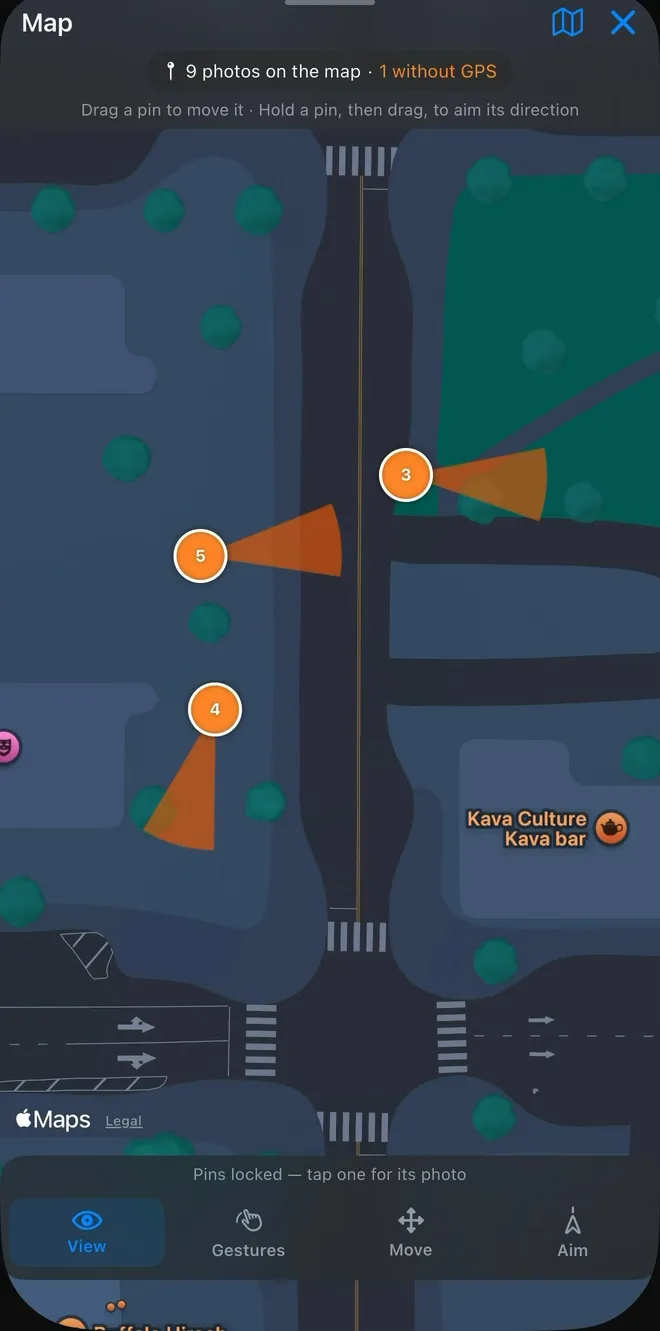
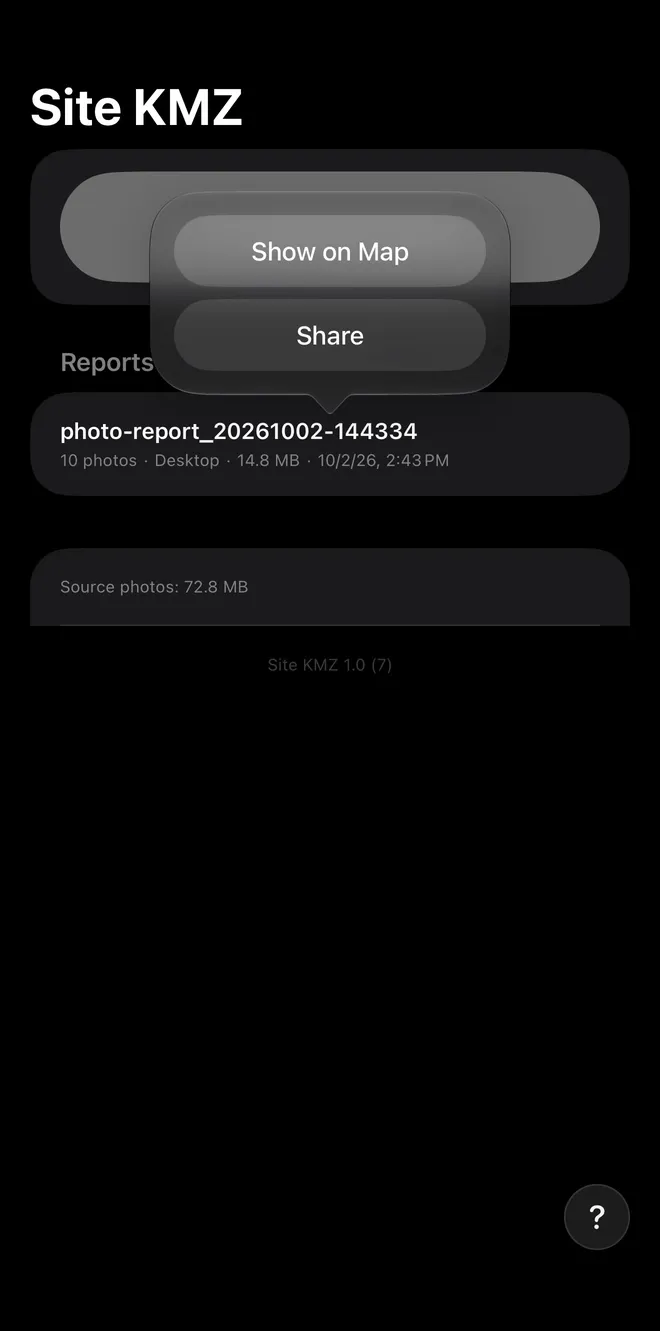
    The file names itself, lands in your Reports library with its photo count, export mode, size and timestamp, and opens straight into Show on Map or Share. In the map view each pin carries a direction wedge showing which way the camera was facing.

    .kmz outputShow on MapShareDirection wedge

Screens

From empty report to mapped file.

Scroll →
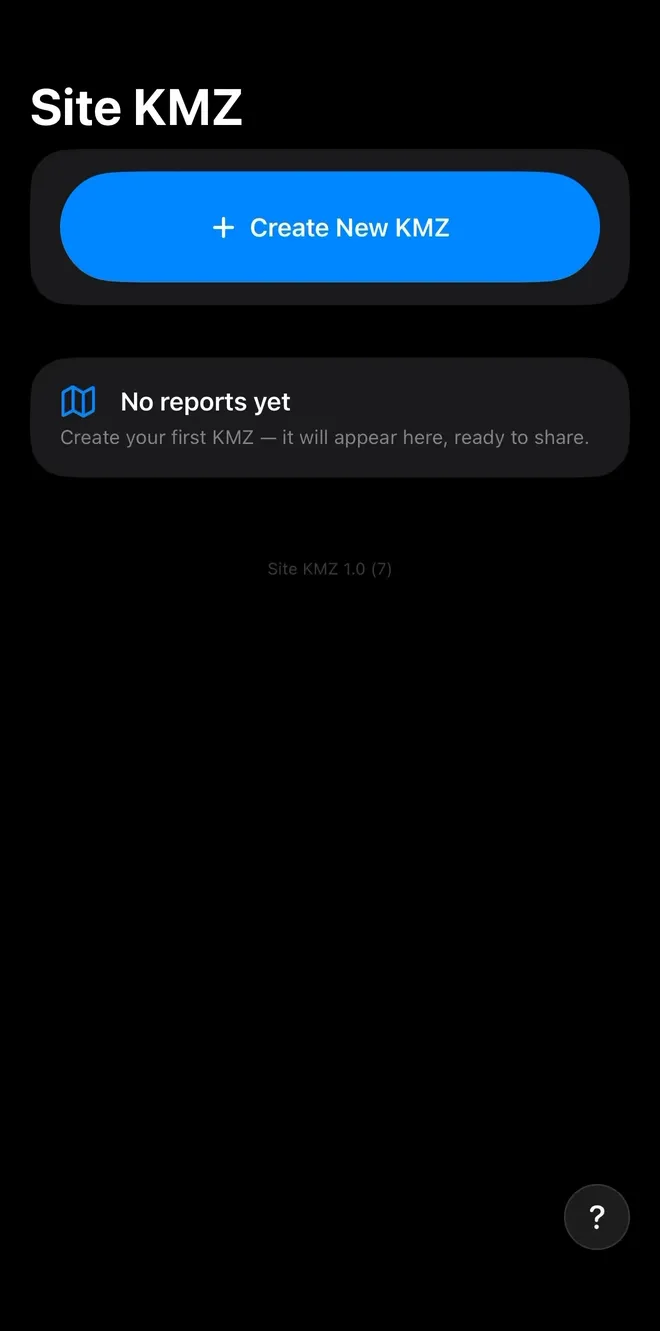
Home screen: the Site KMZ title, a blue Create New KMZ button, and an empty state reading No reports yet, create your first KMZ, and it will appear here, ready to share.
Start a reportHome
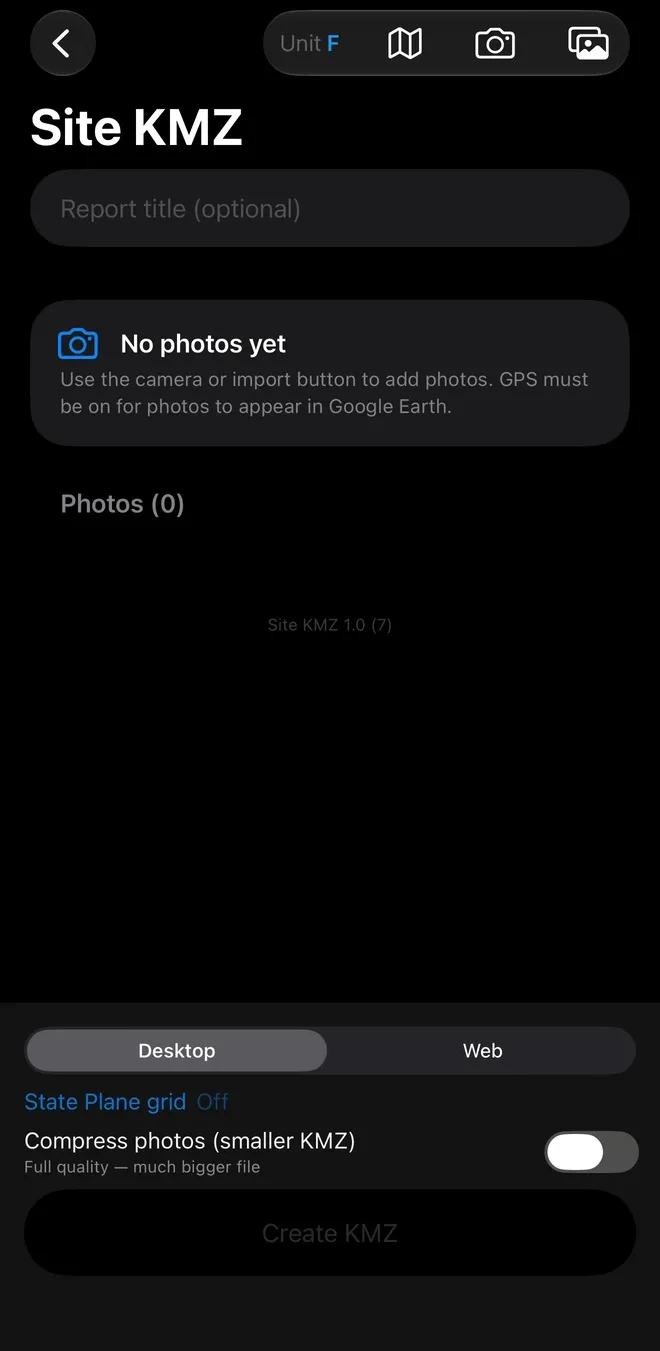
Report builder: an optional report title, the No photos yet hint, a Photos (0) list, and the bottom controls (Desktop selected, State Plane grid Off, Compress photos off, Create KMZ disabled).
Title it, add photosReport builder
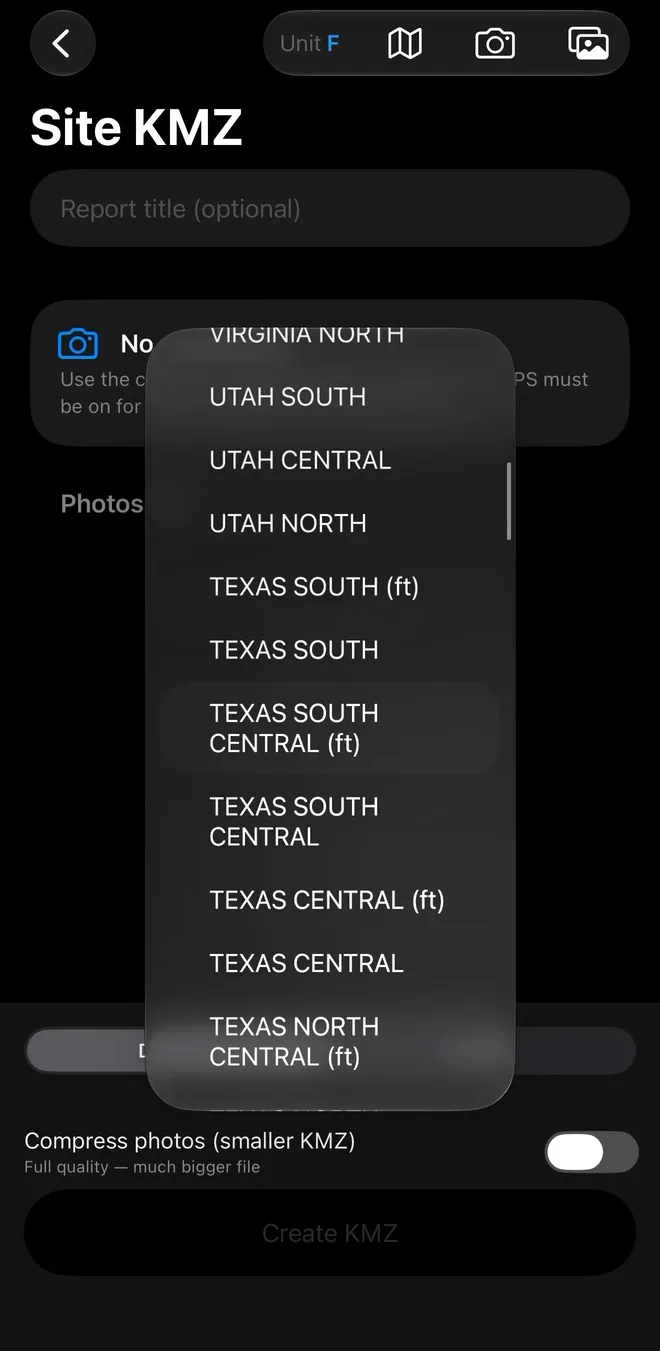
The State Plane grid picker open over the report builder, listing zones from Virginia North down through Utah to the Texas zones, with Texas South Central (ft) highlighted.
Pick the State Plane zoneGrid picker
Export settings with Web selected and the orange warning: Web Earth can't display local photos (this file shows pins, notes and coordinates only). Use Desktop for the photos.
Web mode, honest warningExport settings
Photo rows with thumbnail, timestamp, green GPS tag, compass bearing, coordinates, elevation and a note field, with the last row flagged no GPS in orange above the warning 1 photo without GPS (won't appear on the map).
Every row, stampedPhotos
Markup editor: a photo with a yellow circle and a red arrow drawn on it, a tool row of line, arrow, rectangle, circle and text with dot sizes, a six-colour palette, and undo, redo, delete and clear controls.
Annotate on the imageMarkup editor
Map view with numbered orange pins and their direction wedges, the badge 9 photos on the map · 1 without GPS, and the View, Gestures, Move and Aim tabs.
All pins at onceMap
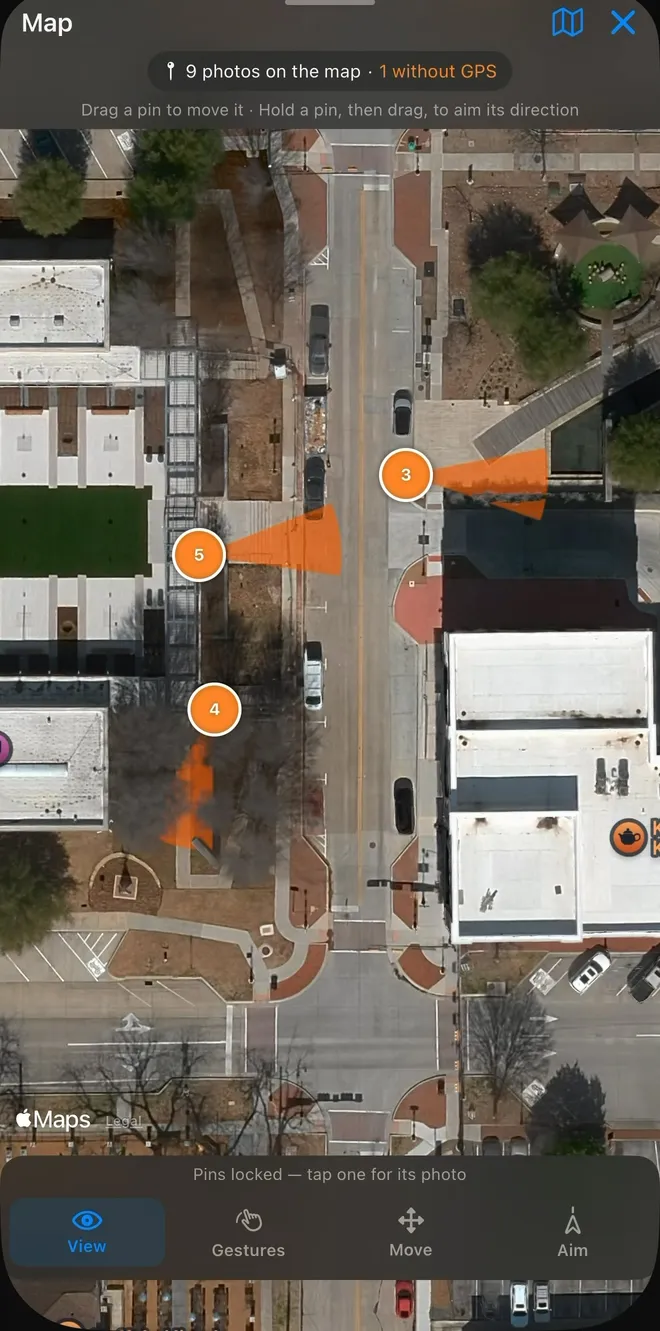
The same map in satellite view: the numbered pins and their wedges over the real streets and blocks.
Same pins, satelliteSatellite
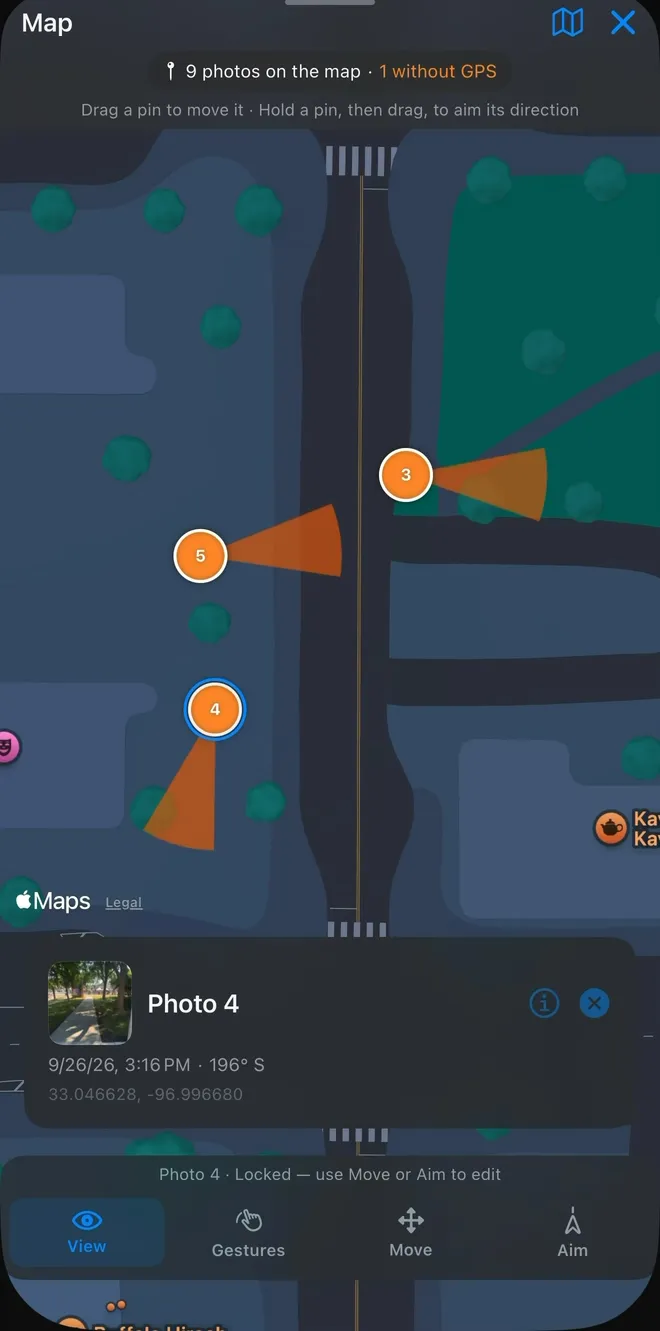
Map with pins locked: pin 4 is selected and its photo card is open below, showing time, bearing and coordinates, and the bar reads Photo 4, Locked, use Move or Aim to edit.
Pins lockedTap one for its photo
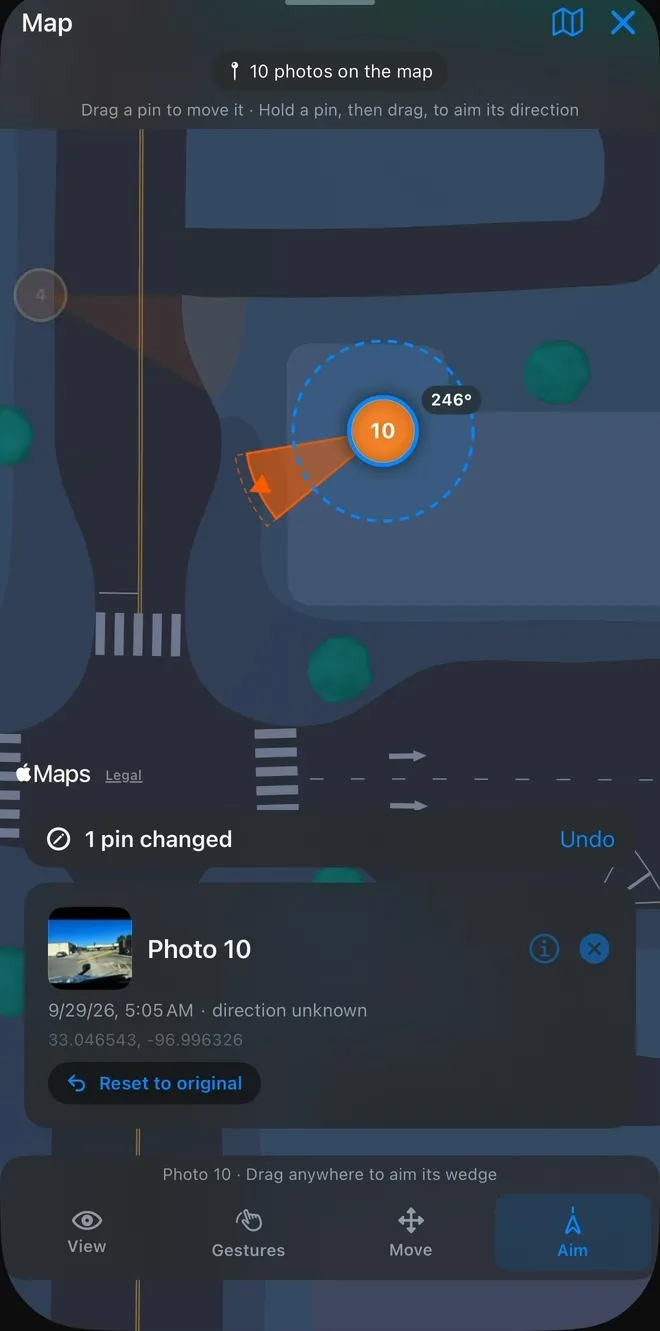
Aim mode on the no-GPS photo: pin 10 selected inside a dashed aim circle with its wedge at 246°, a 1 pin changed bar with Undo, and the photo card reading direction unknown with Reset to original.
Aim the wedgeEdit points
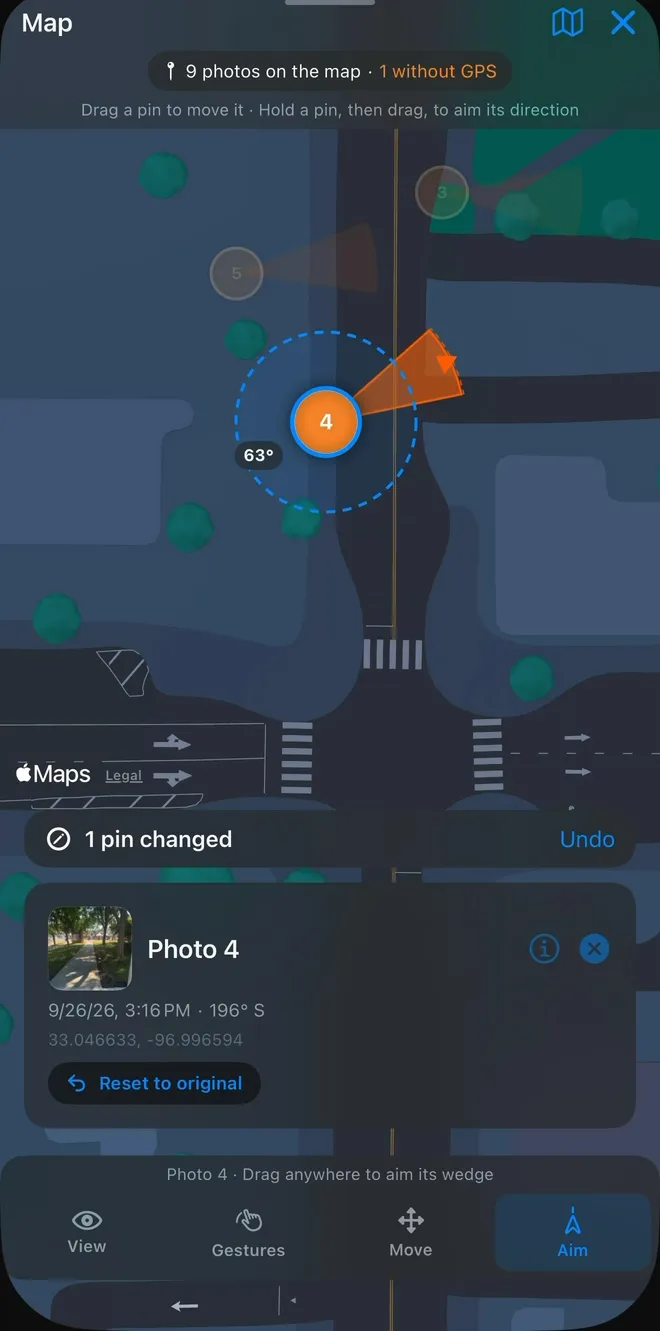
Aim mode on pin 4: the wedge swung to 63° inside a dashed circle, a 1 pin changed bar with Undo, and the photo card showing 196° S with Reset to original.
Point it where it facedEdit direction
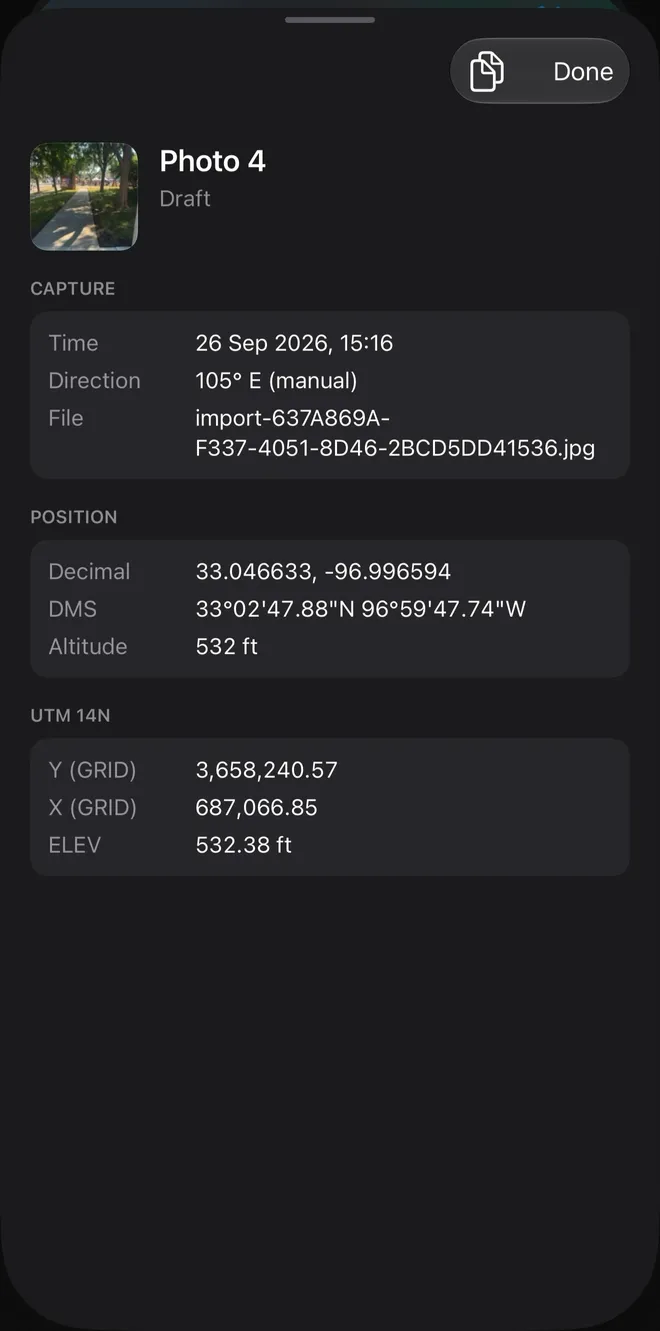
Photo info sheet for Photo 4: capture time, direction 105° E (manual) and source file, position in decimal, DMS and altitude, and UTM 14N grid values with elevation.
The full recordPhoto info
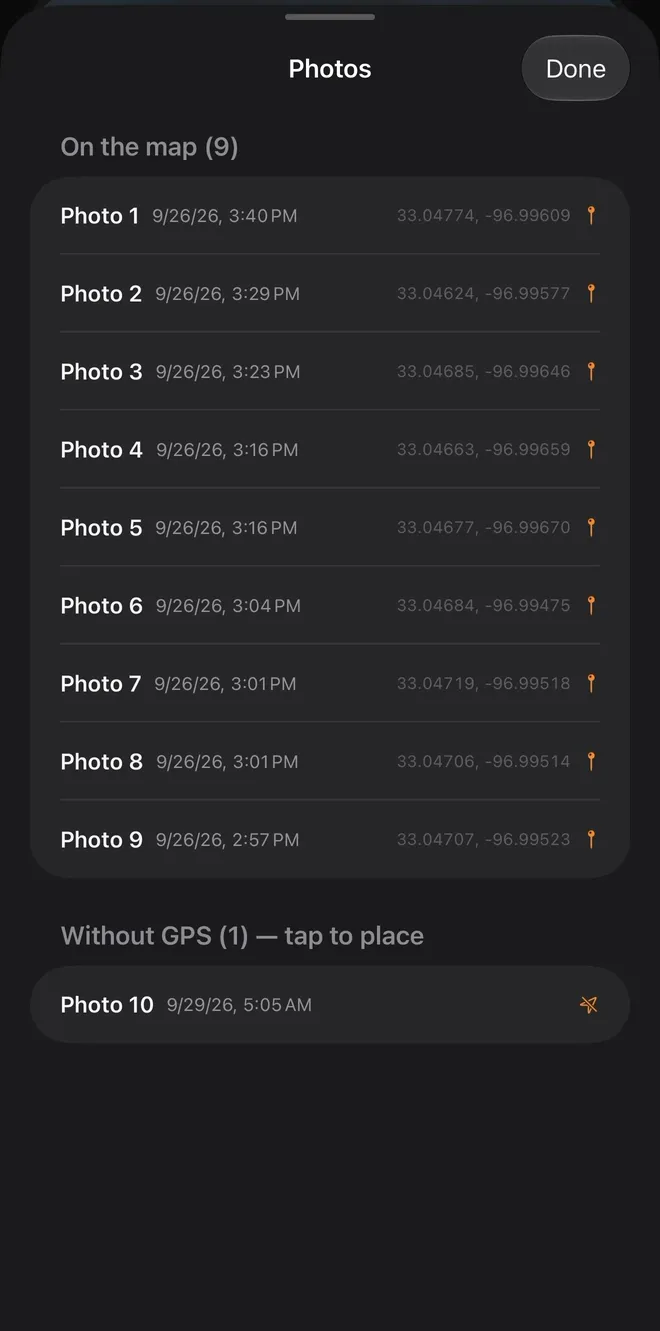
Photos sheet split into On the map (9), each row with its time and coordinates, and Without GPS (1), tap to place, listing Photo 10 with an orange no-GPS mark.
On the map, or not yetNo GPS list
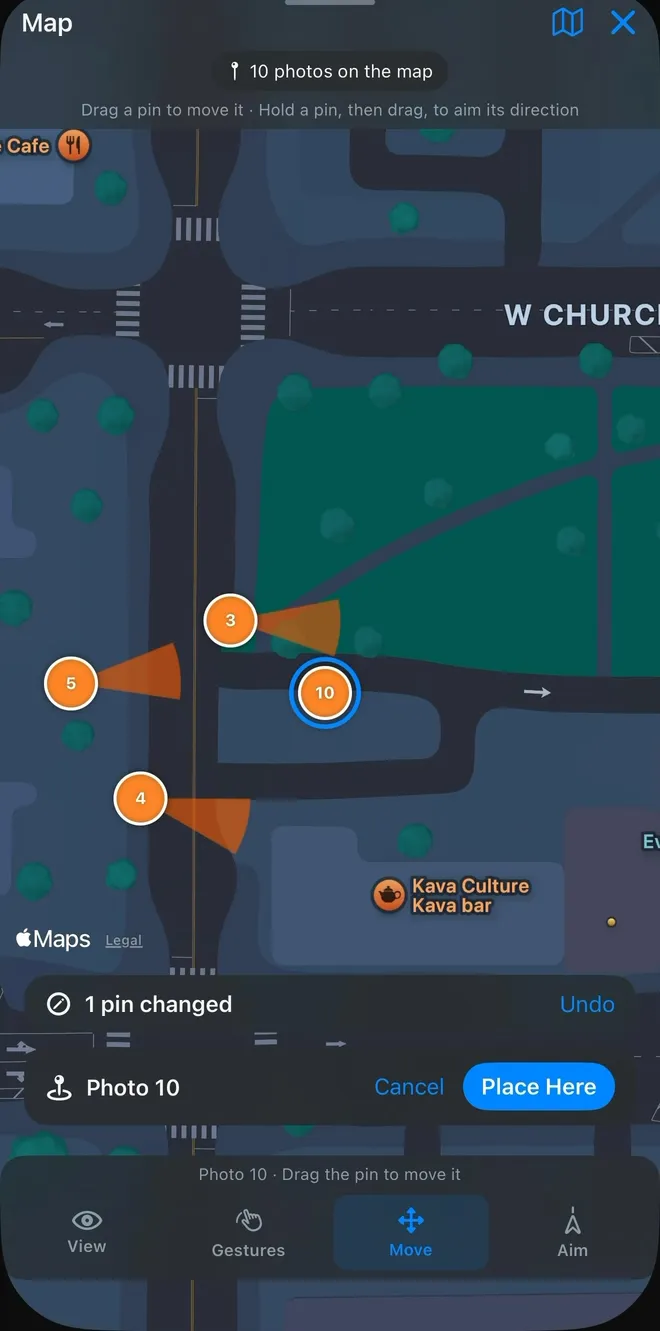
Map with the no-GPS photo's pin dragged to its spot, a 1 pin changed bar with Undo, and the card offering Cancel and a blue Place Here button.
Place it on the mapNo GPS
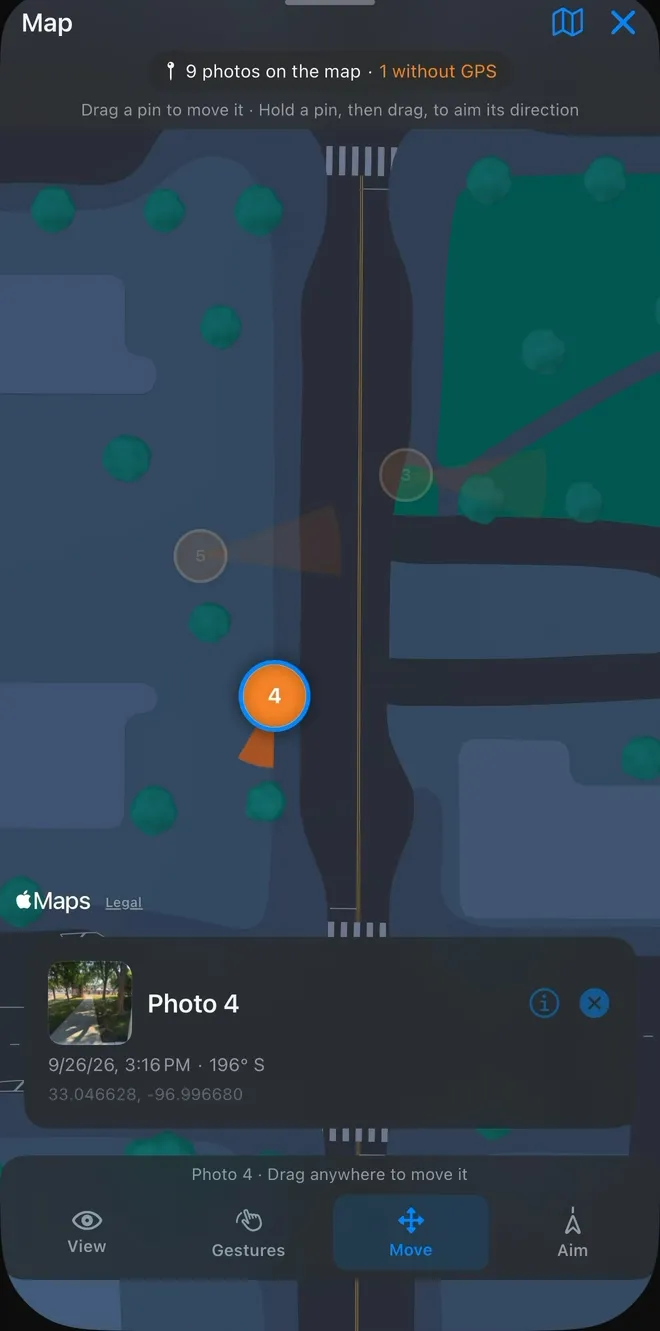
Move mode: pin 4 selected in a blue ring, ready to drag, with its photo card showing time, bearing and coordinates and the bar reading Photo 4 (Drag anywhere to move it).
Drag it to the spotMove mode
Reports screen with the generated photo-report card (10 photos, Desktop, 14.8 MB) and its open menu offering Show on Map and Share, above the Source photos: 72.8 MB card.
Show on Map or ShareReports

Lock points

Pins that can't drift until you say so.

In the map view, pins are locked by default: tap one and its photo opens, nothing else moves. When the geometry needs correcting, Move drags a pin to the exact spot and Aim swings its wedge until it points the way the camera was facing.

Every edit is tracked (a 1 pin changed bar with Undo beside it, and a Reset to original on every photo card). A photo that arrived without GPS gets a row of its own: drag the pin, then Place Here.

Map with pins locked: pin 4 is selected and its photo card is open below, showing the time, 196° S and coordinates, and the bottom bar reads Photo 4, Locked, use Move or Aim to edit.
Photo 4 · Locked View · Move · Aim

Export modes

Desktop keeps the pictures.
Web keeps it small.

Google Earth Web cannot read local image files. Site KMZ is explicit about that, and gives you both options rather than quietly dropping your photos.

CompareBoth modes export a KMZ ModeDesktop ModeWeb
Photo imagery Embedded in the file, full resolution Not included - Web Earth cannot display local photos
Pins, notes & coordinates Included Included
Camera direction wedge From the recorded bearing From the recorded bearing
State Plane grid overlay Optional Optional
File size Larger - full quality, or roughly 0.4 MB per photo with compression on Light enough to email
Best for Google Earth desktop and archive deliverables Quick review and sending to a client or crew

Compression targets about 0.4 MB per photo when it is switched on, which is what makes Desktop mode practical to email. Leave it off when the imagery itself is the deliverable.

Workflow

Eight steps, start to finish.

  1. 01
    Create a reportTap Create New KMZ on the home screen.
  2. 02
    Name itThe title is optional - a filename is generated either way.
  3. 03
    Capture or import photosUse the camera or your library. GPS must be on.
  4. 04
    Review the geotagged rowsCoordinates, elevation, bearing and time, per photo.
  5. 05
    Add a noteCaption any photo directly in its row.
  6. 06
    Annotate on the imageMark the exact area that matters.
  7. 07
    Pick the export settingsDesktop or Web, State Plane grid, compression.
  8. 08
    Create and share the KMZThen Show on Map or Share straight from Reports.

Download

Put Site KMZ in your pocket before the next site walk.

Field documentation that opens in Google Earth (on the App Store and Google Play).

Join the test (we'll email you the link)

Store links go live at launch · GPS must be on for photos to appear in Google Earth